Quick Start Cloudflare DDNS
Contents
Introduction
This article describes the simplest way to quickly get started with Cloudflare DDNS.
Prerequisites
1. Register a Cloudflare Account
We won’t go into detail here; please refer to other tutorials.
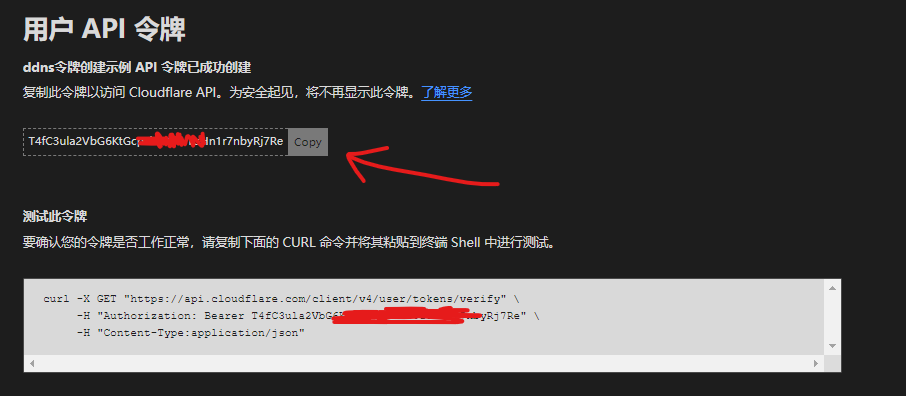
2. Get a Cloudflare API Token
- Visit https://dash.cloudflare.com/profile/api-tokens
- Click “Create Token” and select the “Edit zone DNS” template
- Enter any name
- Set permissions to edit zone DNS:
- Zone - Zone - Read
- Zone - DNS - Edit
- For Zone Resources, select the domain for DDNS
- Client IP Filter (optional) — leave blank since DDNS uses dynamic IPs
- TTL — leave empty

After creation, copy the token.
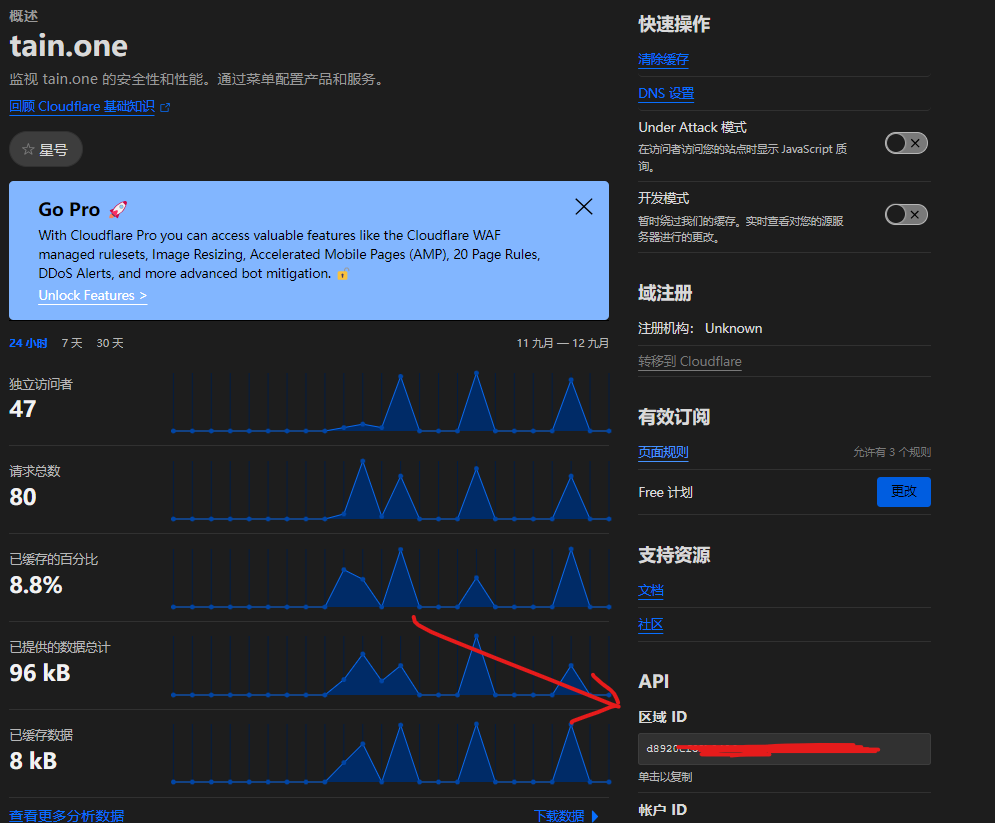
3. Get Your Zone ID
- Visit https://dash.cloudflare.com/
- Select the domain for DDNS
- Find the Zone ID in the bottom-right corner
Quick Start
Windows x64
Basic Usage
- Download
cf-ddns-windows-x64-(version)-RELEASE.exefrom the releases page and rename it tocf-ddns.exe - Place it in a directory, e.g.,
C:\Users\[UserName]\cf-ddns - Open a terminal in that directory and run:This checks IP every 300 seconds and updates DNS on change.
cf-ddns.exe -gen -zoneId=<zoneId> -authKey=<token> -domain=<domain> -v4=<true/false> -v6=<true/false>
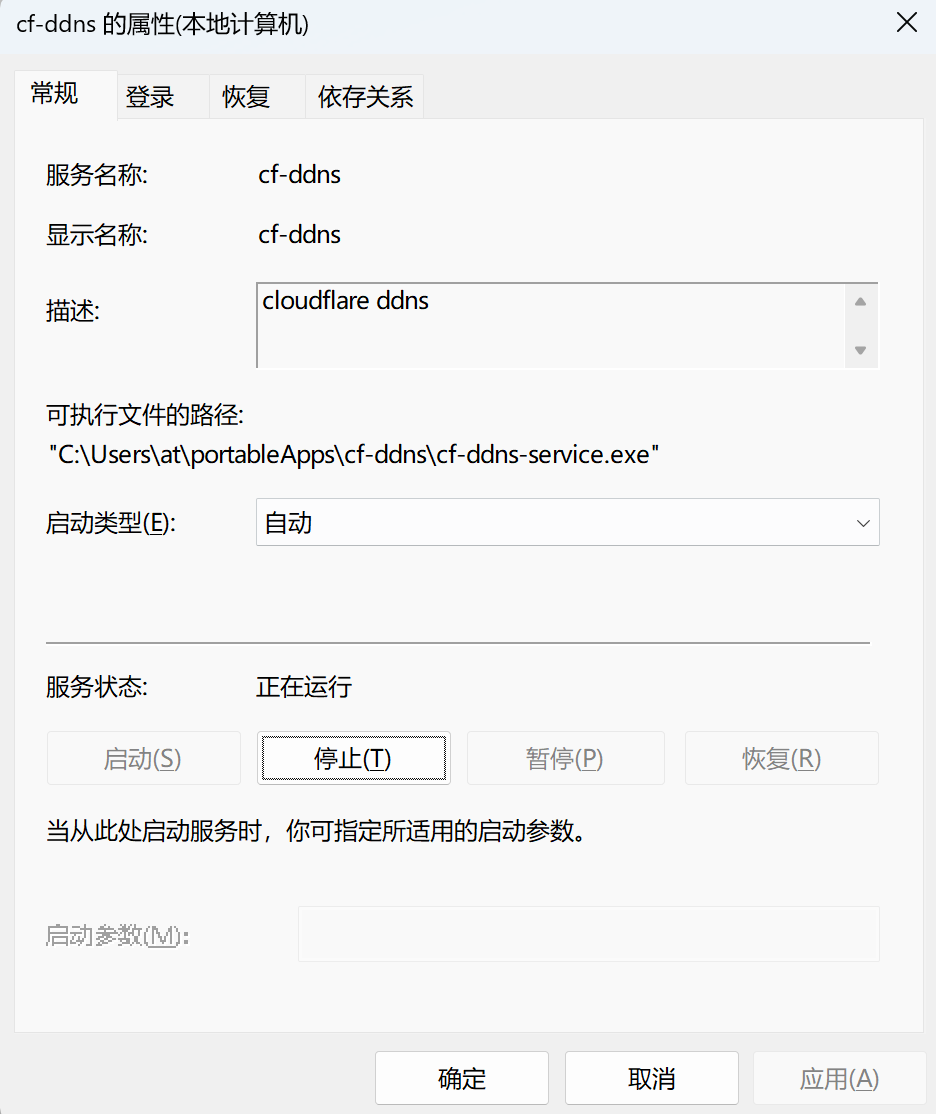
With winsw (Windows Service)
The basic usage requires the terminal to stay open. Use winsw to wrap cf-ddns.exe as a Windows service.
- Download
cf-ddns-windows-x64-(version)-RELEASE.exe, rename tocf-ddns.exe - Place it in a directory like
C:\Users\[UserName]\cf-ddns - Download winsw-2.12.0-bin.exe
- Create
cf-ddns-service.xmlin the same directory:<service> <id>cf-ddns</id> <name>cf-ddns</name> <description>cloudflare ddns</description> <workingdirectory>C:\Users\[UserName]\cf-ddns</workingdirectory> <executable>C:\Users\[UserName]\cf-ddns</executable> <startarguments>-gen -zoneId=<zoneId> -authKey=<token> -domain=<domain> -v4=<true/false> -v6=<true/false></startarguments> <onfailure action="restart" delay="10 sec"/> </service> - Rename
WinSW-x64.exetocf-ddns-service.exe. Directory structure:C:\Users\[UserName]\cf-ddns ├── cf-ddns.exe ├── cf-ddns-service.xml ├── cf-ddns-service.exe - Install the service:
cf-ddns-service.exe install cf-ddns-service.xml - Start the service:
cf-ddns-service.exe start cf-ddns-service.xml - Check status:
cf-ddns-service.exe status cf-ddns-service.xml - Uninstall:
cf-ddns-service.exe uninstall cf-ddns-service.xml
The service will run in the background and survive reboots.
Linux x64
Basic Usage
- Download
cf-ddns-linux-x64-(version)-RELEASE.kexefrom the releases page - Rename and set permissions:
mv cf-ddns-linux-x64-(version)-RELEASE.kexe cf-ddns && chmod +x cf-ddns - Move to
/usr/local/bin:mv cf-ddns /usr/local/bin - Run:
cf-ddns -gen -zoneId=<zoneId> -authKey=<token> -domain=<domain> -v4=<true/false> -v6=<true/false>
With systemd
1-3: Same as above.
Create service:
vim /etc/systemd/system/cloudflare-ddns.service[Unit] Description=cloudflare-ddns After=network.target [Service] Type=simple ExecStart=/usr/bin/cf-ddns -gen -zoneId=<zoneId> -authKey=<token> -domain=<domain> -v4=<true/false> -v6=<true/false> Restart=on-failure [Install] WantedBy=multi-user.targetStart and enable:
systemctl start cloudflare-ddns
systemctl enable cloudflare-ddns
With Cron
1-3: Same as above.
Edit crontab:
crontab -eAdd:
*/5 * * * * /usr/local/bin/cf-ddns -gen -zoneId=<zoneId> -authKey=<token> -domain=<domain> -v4=<true/false> -v6=<true/false> -once
Docker
docker-cli
docker run -d \
    --network host \
    --name cf-ddns \
    --restart unless-stopped \
    selcarpa/cloudflare-ddns:latest \
    -gen -zoneId=<zoneId> -authKey=<token> -domain=<domain> -v4=<true/false> -v6=<true/false>
docker-compose
services:
  cf-ddns:
    image: selcarpa/cloudflare-ddns:latest
    network_mode: host
    container_name: cf-ddns
    restart: unless-stopped
    command:
      -gen -zoneId=<zoneId> -authKey=<token> -domain=<domain> -v4=<true/false> -v6=<true/false>
This article is translated by deepseek-v4-flash (model: deepseek/deepseek-v4-flash).